How To Install A Shower Kit
From $263.33 Regular Price $405.13
To $2,164.21 Regular Price $3,329.49
In stock

This is the best opportunity on how to install a shower kit to enhance the performance of your restroom and present a new style element at the same time. Are you upgrading your existing wet-area, or installation a brand name brand-new restroom?
Prior to you start
This job information the setup of a wet-area base, wall panels and door. The rough pipes must remain in location prior to setup.
* For the setup of a wet-area base just, go to actions 1-5.
* For the setup of a pivot door, go to step 7.
* Check out the task install a bath or wet-area faucet to find out more.
* Guarantee the framing satisfies the producer's specifications. Particular producers require studs spaced at 12" periods to support the wet-area stall instead of the standard 16" periods.
* It is more effective to set the prefabricated wet-area base in cement or on a drains for shower kits concrete piece subfloor.
* Throughout the setup, protect the interior surface of the wet-area base with thick cardboard or a protective cover.
1. Set up the cement board on the flooring
* 1.1 - Block the drain with a properly-fitting ABS cap or a tidy rag.
* 1.2 - Measure the floor space along with the specific place of the drain pipe.
* 1.3 - Cut the cement board, then cut the opening for the drain with a 3 1/4" hole saw.
* 1.4 - Examine that the panel fits well on the frame and that the opening lies where it must be.
* 1.5 - Glue the cement board panels to the subfloor with construction adhesive.
* 1.6 - Get rid of the ABS cap or rag.
* 1.7 - Determine the height of the drain pipeline, which ought to stand 1/2" proud of the flooring. Cut the excess.
* 1.8 - Put a plastic bag over the drain and protect with a tie wrap.
* 1.9 - If required, include wood studs on each side at the front of the wet-area to barrier free shower kits support the pivot door. Plastic or fibreglass structures are not solid enough on their own.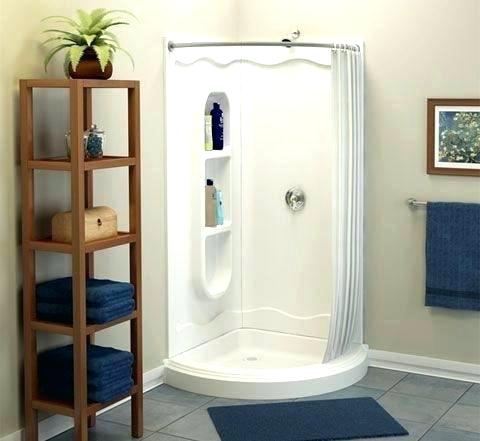 2
2
Level the wet-area base
For a shower that will have tiled walls, use a bead of silicone sealant to the tiling flange and screw to the sides of the wet-area base.
- 2.1 - Test fit the base to make sure the drain is aligned with the opening.
- 2.2 - Look for level and guarantee that the space between the studs and the edge of the base is no more than 1/8". If necessary, place shims under the base.
- 2.3 - Mark the top edge of the base on all three sides.
3
Set the drain on the base
- 3.1 - Run a bead of sealant under the body of the drain.
- 3.2 - Insert the body of the drain (5) into the opening in the wet-area base.
- 3.3 - Place the rubber gasket (6) on the threaded end under the wet-area base. Press down.
- 3.4 - Place the fibre gasket (7) on the rubber gasket, then screw on the nut (8 ). Tighten a 3/4 turn with a wrench, however do not over-tighten.
- 3.5 - Put dishwashing liquid on completion of the body of the bottom drain (5) and drain pipe to make it much easier to link them.
4
Installationlation the base
- 4.1 - Spread out a 1" layer of self-compacting concrete. Secure the drain location. Embed in the base and line up the drain pipeline with the bottom drain.
- 4.2 - Press down so that there is good contact with the concrete.
- 4.3 - Guarantee that the top edge is lined up with the marks on the studs and that the base is level.
- 4.4 - Secure the base with a protective sheet.
- 4.5 - Screw the base into the studs or fasten to the studs with clips offered by the manufacturer.
5
Connect the drain
- 5.1 - Cover the neoprene ring (4) with a silicone lubricant, then insert it into the leading part of the drain (5 ).
- 5.2 - Screw the threaded ring (3) onto the drain (5) and installing a shower in a kit tighten up.
- 5.3 - Clean the drain and get rid of any residue.
- 5.4 - Place the strainer (1 ).
- 5.5 - Plug the drain once again.
- 5.6 - Pour some water into the wet-area base and look for leakages. Bubbles around the drain indicate leaking.
- 5.7 - Unplug the drain.
- 5.8 - Guarantee there isn't any water build-up which water is flowing appropriately.
6
Set up the shower panels
This section deals with modular wet-areas with wall panels and does not detail tile or drywall installationation.
Ensure there is wood framing behind the front of the wall panels to installation the pivot door.
- 6.1 - Installationlation the back panel and insert the tabs into the suitable slots in the base.
- 6.2 - Step and mark on the wall the place for the faucet, wet-area head, and spout. Validate with the design template offered by the producer to ensure the places match.
- 6.3 - If a template has actually not been consisted of with your pipes hardware, take a large piece of cardboard and press it versus the wall where the faucets will be installationed. The overview of the different components will make a mark on the cardboard. Eliminate the cardboard.
- 6.4 - Press the cardboard against the wet-area wall panel and transfer the markings for the place of the pipes components.
- 6.5 - Compare the measurements on the cardboard to the measurements on the wall.
- 6.6 - Figure out the measurement of the hole for the tap valve. Make sure the decorative cover plate will cover the hole.
- 6.7 - Use a hole saw to drill a hole for the valve.
- 6.8 - Slide in the panel, leading. Line up the valve with the hole in the panel.
- 6.9 - Securely press the panel against the studs.
- 6.10 - Slide in the last panel, beginning at the top.
- 6.11 - Properly align the bottom of the panels with the edge of the base. The gap between the panels and edge of the base need to not go beyond 1/32".
- 6.12 - Examine the walls for plumb.
- 6.13 - Secure the front of the panels to the studs, from bottom to top.
- 6.14 - Use galvanized screws to protect the top. Shim where essential.
- 6.15 - Cover the tops of the panels with waterproof moulding.
- 6.16 - Installationlation the faucets according to the producer's guidelines.
- 6.17 - Apply silicone sealant to water resistant all joints, consisting of the ornamental cover plate.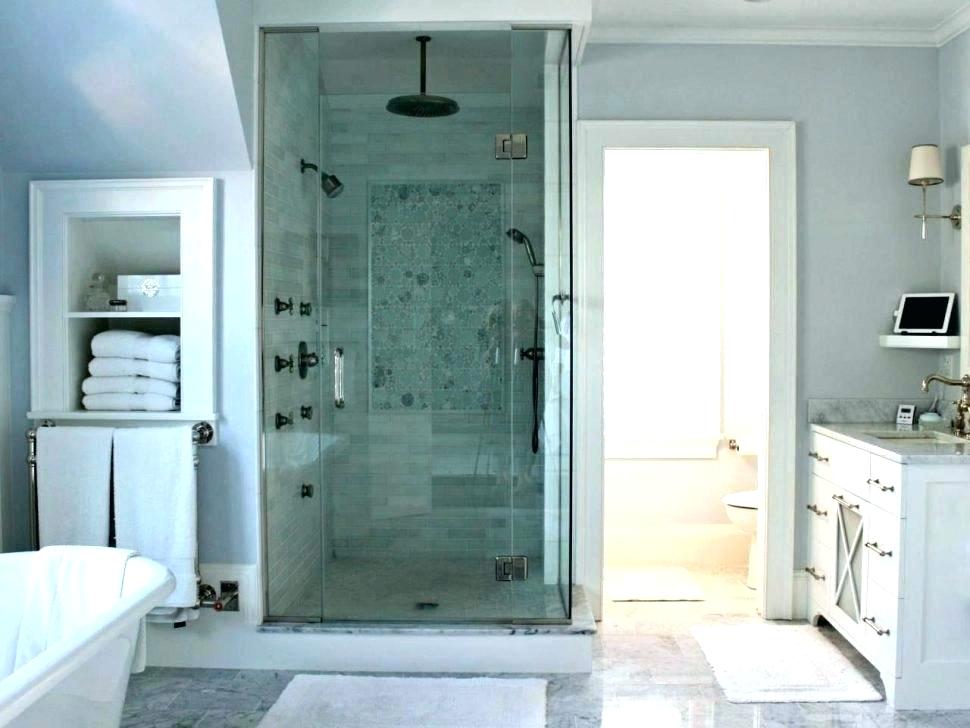 7
7
Set up the pivot door
- 7.1 - Figure out how you desire the door to open. The pivot hinges will be installationed on the side opposite the wet-area head.
- 7.2 - Mark the area of the limit, 1/8" from the within edge.
- 7.3 - Measure the width of the wet-area base.
- 7.4 - Cut the base track to this measurement, less 1/16".
- 7.5 - Run a bead of silicone sealant under the threshold and protect to the base at the previously marked locations.
- 7.6 - Set up the pivot hinges at the two ends of the stud.
- 7.7 - Location the pivot jamb against the wall and on the threshold. Level vertically.
- 7.8 - Mark the place of the screw holes and get rid of the jamb.
- 7.9 - Drill the screw holes and screw the jamb to the structure.
- 7.10 - Depending on the design, connect the drip rail to the bottom door frame.
- 7.11 - Insert the lower pivot for the bottom of the door in the limit hinge system.
- 7.12 - Slide the upper pivot on the door and screw in the upper hinge.
- 7.13 - Line up the magnetic strip from the opposite, on the limit, kits for an outdoor shower opposite the door jamb.
- 7.14 - Align vertically.
- 7.15 - Mark the place for the screw holes and eliminate the jamb.
- 7.16 - Drill the holes and screw the jamb to the structure.
- 7.17 - Close the door and open to inspect the magnetic strips are aligned.
- 7.18 - Installationlation a water resistant seal around the door.
- 7.19 - Place the plastic screw plugs and caulk the jambs and limit with bathroom sealant.
Installationlation wet-area packages directly to wall studs is a project many DIY homeowners can do themselves.
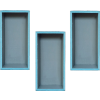
Panels formed as a single molded unit fit in the tub or wet-area alcove and are typically utilized in brand-new building. stall shower kit
The other type of wet-area panels, typically used in restroom renovations, come as specific panels that connect together and connect to the wall to form a watertight seal.
This job presumes your old tub wet-area or surround has been removed which you are remodeling your tub or wet-area alcove with panels that connect together. View Our Shower Kits These panels have flattened edges, called flanges, that can be nailed straight to the wall studs.
As you deal with your job, make certain to follow any maker guidelines that come with your wet-area set.
Merely updating the components or tiling the wet-area is an easy method to supply a facelift and offer a boost to your resale worth. You might decide to set up a whole brand-new wet-area to update to modern design or new innovation.
Updating an old wet-area is a fantastic way to refresh your bathroom. And if you're just replacing like for like, and do not need to move any plumbing round, then setting up a brand new wet-area enclosure is really a task you can do yourself
How to Install A Shower Kit requires you to construct wood framing to support the walls of the enclosure. If you put the wet-area in a corner, you need to construct less walls. In any case, the maker provides a layout strategy for the enclosure. Follow it thoroughly. You usually position the wall studs closer together than on a standard wall.
One benefit to install this type of wet-area enclosure is that you mount the wall panels straight to the wall studs, so you do not require drywall or backerboard. Before installation the wet-area stall, you can set up wood support for grab bars.
The wet-area enclosure needs a 2-inch drain focused in the enclosure. The rough-in dimensions give the specific measurements for its area. Unless you're experienced with pipes, you need to leave this part of the job to a professional. To set up a wet-area enclosure, you need these materials:
- 2 x 4s or 2 x 6s
- 2-inch masking tape
- Carpenter's square
- Dropcloth.
- Electric drill.
- Hammer.
- Hole saw or jigsaw with fine-tooth blade (32 teeth per inch).
- Large-head nails.
- Level.
- Determining tape.
- Pliers.
- Putty knife.
- Screwdrivers.
- Silicone sealant (for wet-area door setup).
- Utility knife.
- Woodworking tools.
After you've produced the enclosure, follow these directions to set up the wet-area:.
Determine and open the packaging all the parts of the enclosure.
Place the wet-area receptor in the enclosure and check that it's level and does not rock back and forth. You may have to installation shims under the receptor to level it. Put the essential shims in place and retest the level of the wet-area. When the surface is steady, get rid of the stall shower kit shims one at a time, use construction adhesive to them, and replace them.
Use galvanized roof nails to secure the receptor to the wall framing. Follow the manufacturer's recommendations and drive the nails through the predrilled flange holes, or place the nail versus the top of the flange so that the head of the nail captures the flange.
Position the panels in the enclosure. Some packages have wall panels that interlock to form leak-proof seals. In this case, follow the maker's directions and position the panels in the enclosure in the proper series so that they can interlock.
Inspect that the panels fit comfortably against the wall framing. Since of the rough-in plumbing, you can't position the panel at the wet-area valve end of the enclosure versus the studs yet.
Mark the location of the shower valve and wet-area riser pipeline by making a cardboard design template of the location of the valve and wet-area head pipeline.
Location the design template on the wet-area enclosure panel and drill a pilot hole at the center of the cutout to assist the hole saw.
Use a hole saw or jigsaw with a fine-tooth blade to make the holes for the valve controls and the wet-area head pipeline.
Set up the wet-area wall panel on which the valve lies. Examine that you have all panels effectively lined up and square and that you have the wet-area valve and wet-area head pipe correctly lined up.
Attach the panels to the wall framing with galvanized roof nails. Wherever you find a gap between the wall stud and the wet-area wall panel, place a wood shim prior to driving the nail.
Apply silicone caulk to all joints in the enclosure. Follow the manufacturer's instructions and use an excellent caulk.
Trugard’s Wet-area Kit is among the very best alternatives for wet-area remodels. But every wet-area job has obstacles.
And it's super easy to make bad mistakes, even with the Trugard wet-area set.
Trugard Wet-area Kit Part 1: Starting.
In this restroom we installationed a 4 ′ x 5 ′ wet-area and used the Trugard wet-area package; it included a 48 ″ x 72 ″ wet-area pan, which we cut to size. Our wall substrate was drywall which will be waterproofed utilizing Trugard membrane. We advises drywall for this kind of setup, but you could avoid this action and use Trugard Board
Also, an 8 foot curb includes the package, and we'll show how to suffice down to 5 feet.
Trugard wet-area systems need a solid subfloor and in this example we had a 3/4 ″ plywood subfloor. Inspect the flooring is level by utilizing a 4 foot level.
In this wet-area we installationed a 12 × 28 inch wet-area niche in the corner of the wet-area plumbing wall, which was the only interior wall. It's essential to only installation wet-area specific niches inside interior walls. Due to the fact that our tile will run into it from the primary wall, we had to cut the edge of the specific niche and tailor it for this setup.
Niches are installationed utilizing screws and washers. Cut and healthy drywall around the specific niche and the rest of the walls in the wet-area. It's crucial the wet-area stud walls be plumb and even with each other. Screw drywall to the studs utilizing acceptable building regulations screw spacing and screw length, we utilized 1-5/8 ″ coarse threaded screws.
When the drywall is set up the next step is to dry fit the wet-area tray, cut it to size, and dry fit the wet-area drain. Remember the wet-area tray can be cut to size within factor. Trugard Wet-area Kit Part 2: Waterproof Walls.
For this job we utilized ALL-SET, which is a great thin-set mortar for their wet-areas. Utilize a trowel to work the mortar into the drywall surface. Directionally trowel ALL-SET on the wall to assist get rid of air spaces and collapse all the ridges in the mortar.
Compress Trugard membrane into the walls, going from the ceiling to the flooring. Eliminate air gaps and flatten using either trowel or 6 inch drywall knife. Overlap all Trugard membrane by 2 inches.
Trugard Wet-area Package Part 3: Water Resistant Wet-area Pan & Curb.
We likewise utilized ALL-SET to adhere the pan to the 3/4 ″ plywood using a 1/4 ″ x 3/8 ″ square notch trowel. All mortar ridges ought to face the exact same direction. Set the pan in the mortar, walk on it to compress the mortar, and check the coverage by lifting it up.
Apply mortar to the edge of the pan and the first 6 inches beyond the pan where the curb will rest. Set the curb in the mortar and examine that it's level, specifically if using glass wet-area doors or glass panels which require the curb level.
We really forgot to install our corner bench and needed to do that after setting the pan. Not a huge offer, however the bottom of the bench has to rest on the plywood. Waterproof the bench using 2 outdoors corners and one inside corner, then overlap these with Trugard-Band.
Apply ALL-SET around the wet-area drain and glue it to the P-Trap below the wet-area pan. In our prior video we went over how to dry fit the drain pipe and cut the ABS to size.
Cut Trugard membrane to the size of the pan and apply mortar to the top of the wet-area pan, fill in all the waffles with the flat side of the trowel. Embed the Trugard membrane to the top of the pan, and scribe cut it versus the bench. Get as tight as possible to the wall but do not stress over it being precise. This intersection will be waterproofed utilizing Trugard-Band, which will overlap the wall and wet-area pan.